Why teams use Google Sheets for receipt workflows
Google Sheets is still one of the fastest ways to build a flexible expense-tracking system. It is collaborative, easy to share with accountants, simple to customize, and good enough for a lot of founder-led and small-business workflows.
The real problem is not the spreadsheet. It is getting receipt data into the sheet without manually copying fields from every document.
What “export receipts to Google Sheets automatically” should mean
A good workflow should do more than dump a file into a spreadsheet. It should help you capture the receipt, extract the right fields, standardize the columns, and append new rows without breaking the structure of the sheet.
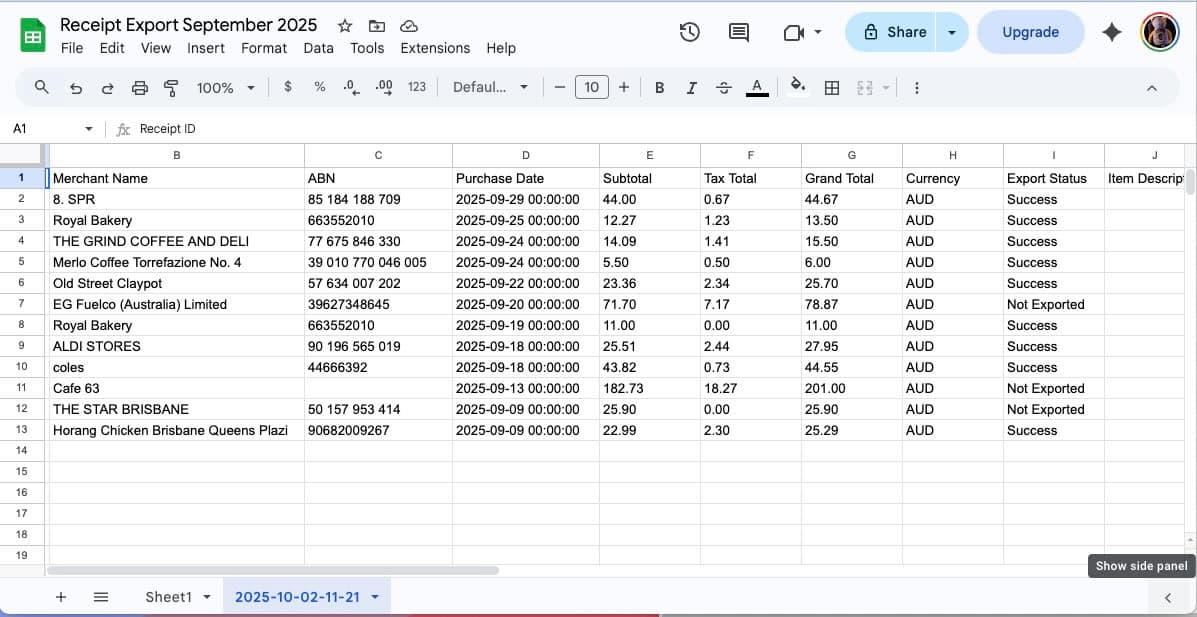
At minimum, you usually want these columns:
- Date
- Merchant
- Category
- Currency
- Subtotal
- Tax
- Total
- Source document link
- Notes or confidence flags
Best ways to export receipts to Google Sheets
1. Direct sync from a receipt workflow tool
The cleanest option is to use a tool that already extracts receipt data and can push the structured result into Google Sheets. This is better than raw CSV dumping because it keeps the workflow closer to the source document and reduces cleanup work.
Receipt Reader AI fits this pattern well if your goal is to turn receipts into structured data first, then move them into Sheets for reporting or review.
2. CSV export into a master sheet
If direct sync is not available for your setup, CSV import is the next best option. The key is to use a stable column structure so every import appends to the same reporting model.
3. Email or automation-driven workflows
If receipts arrive in inboxes, email-forwarding plus structured export can be more useful than camera-only scanning. In that setup, the spreadsheet becomes the reporting surface, while email and AI extraction handle intake.
Recommended Google Sheets workflow for small businesses
- Capture or forward receipts into a structured extraction tool
- Review extracted fields before export
- Append standardized rows into a single Google Sheet
- Use a second tab for monthly rollups or category summaries
- Share the reporting view with your accountant or finance lead
How Receipt Reader AI fits into a Google Sheets workflow
Receipt Reader AI is useful here because it does not treat the sheet as the whole workflow. The product handles capture, extraction, and review first. Google Sheets then becomes the destination for reporting, tracking, or custom analysis.
That matters because many spreadsheet-based receipt systems break when the sheet is expected to do intake, validation, and reporting all at once.
Common mistakes when exporting receipts to Sheets
Using inconsistent columns
If one export uses “Total” and another uses “Amount Paid,” the reporting layer becomes fragile. Standardize your schema early.
Skipping review
Bad data in a spreadsheet is still bad data. Review low-confidence fields before they become the source for reporting.
Treating attachments as optional
When possible, keep a link back to the source receipt or invoice. That makes reconciliation and audit review easier later.
When Google Sheets is the right destination
Google Sheets is a strong destination if you want:
- Lightweight expense tracking
- Custom reporting
- A shared operations or bookkeeping view
- A simple bridge before moving into a fuller accounting process
It is especially useful for founders, freelancers, bookkeepers managing lightweight workflows, and teams that want visibility without adding a heavier finance stack immediately.
When to move beyond Sheets
If you need approvals, stronger controls, deeper reconciliation, or a proper ledger workflow, Google Sheets should stay the reporting layer rather than the primary accounting system.
That is where a tool like Receipt Reader AI plus an accounting destination such as Xero or QuickBooks becomes the better long-term workflow.
Final takeaway
The best way to export receipts to Google Sheets automatically is to treat Sheets as the destination, not the place where all the messy document work happens. Capture first. Extract second. Review third. Then append structured data into the spreadsheet.